| Normal Arena ➥ Arena | Arena Rewards |
Colosseum ➥ Colosseum | Colosseum Rewards |
| Challenge Arena ➥ Challenge Arena | Challenge Arena Shop |
Vortex Arena ➥ Vortex Arena |
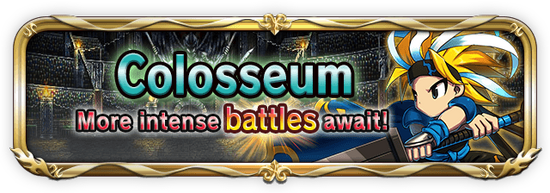
The Colosseum is a combat stadium where players can test their units in battle against each other.
The player must be at Warrior rank in Normal Arena before participating in Colosseum. Additionally, to enter Colosseum, you require one Colosseum ticket.
Upon winning, Colosseum Battle Points, or CBP for short will be awarded. Losing will reward nothing, unless multiple Colosseum Tickets were used at once. CBP can be used to exchange items in Colosseum Rewards.
Unlike the usual Normal Arena, both the opponent and the player can use Super Brave Burst and have Extra Skill effects active.
Mechanics
Colosseum Tickets
![]()
- To play, minimum of 1 Colosseum Ticket is required. Up to 10 tickets can be used at once, the more tickets used, the higher the rates of earning CBP when won. 5 Colosseum Tickets can be purchased for 1 Gem.
- Colosseum Tickets are earned from Normal Arena. Up to 3 tickets can be received per each battle won.
Classes
- There are 4 classes that a player can choose to participate in.
- Each class has a cost restriction. Only units equal to or lower than the cost restriction can be used in each class.
- Warrior Class - Units with Cost less than or equal to 45 allowed.
- Gladiator Class - Units with Cost less than or equal to 50 allowed.
- Conqueror Class - Units with Cost less than or equal to 54 allowed.
- Hero Class - No Cost restriction
Squad Building
- A player must select 7 units from their inventory, which will be used to make both a First Strike squad and a Second Strike squad.
Formation Buffs
- Before starting a match, a player must choose a Formation Buff which will be used against the opponent in a rock-paper-scissor style minigame which will cancel either the player or the opponent's buffs.
- For First Strike Squad, if your Formation Buff is strong against the opponent's, the opponent's Formation Buff is negated and they start with Empty BB gauges.
- For First Strike Squad, if your Formation Buff is weak against the opponent's, your Formation Buff is negated and you start with Empty BB gauges.
- For Second Strike Squad, if your Formation Buff is strong against the opponent's, the opponent's Formation Buff is negated and they start with Empty BB gauges.
- For Second Strike Squad, if your Formation Buff is weak against the opponent's, your Formation Buff is negated and you start with Empty BB gauges.
- If neither win, both Formation Buffs are retained.
List of Formation Buffs
 - 25% boost to Atk
 - 100% boost to HP, Atk for Middle Unit
 - 50% boost to HP, Atk for Top, Bottom Units
Formation Buff Weakness Loop
| - | |||
| - | |||
| - |
| - | |||
| - | |||
| - |
Squad Support
Supports can be used on the First Strike Squad and the Second Strike Squad. The supports selected are respective for each squad and remain active throughout the battle it's activated in.
- Case Aversion - Restores HP (500~2000) each turn & boosts resistance (50%) against status ailments
- Brave Rising - Boosts BB gauge each turn (2 BC) & boosts BB gauge fill rate (25%)
- Chaos Revenge - Adds random (8%) status ailment counterattack
- Blade Revenge - Adds probable (10%) counterattack (reflects 20~25% damage taken)
Random Rules
As the title suggests, you can add a random rule to an Arena match. What rule is activated is random and will vary between matches. Note that random rules may not show up during a match. You will gain additional points when you win with a random rule. A brief explanation of possible random rules is shown below.
These restrict certain abilities.
![]()
- This disables both teams from using Brave Burst or Super Brave Burst.
![]()
- This disables the Leader Skill for both teams.
![]()
- This disables all spheres on both teams.
![]()
- This disables Extra Skills on both teams.
These rules give certain units an advantage when starting a match. The advantage is a 50% boost to HP, Atk, Def and Rec.
![]()
![]()
![]()
![]()
![]()
![]()
![]()
![]()
![]()
- Both teams start with empty BB gauges instead of half-full.
![]()
- The Atk stat of both teams is halved.
![]()
- Some members from both teams start with a random status ailment
Battle
- There are two rounds. Battle 1 is your First Strike squad vs. opponent's Second Strike squad. Battle 2 is your Second Strike squad vs. opponent's First Strike squad.
- If both players won a battle, there are 3 criteria to determine the winner:
- Cumulative HP% of remaining units
- Total number of units not downed.
- If both above criteria are at a tie, the final criteria is total damage dealt.
Balancing Updates
Balancing Updates from v.1.12.2:
- Conqueror Class's maximum unit cost restriction increased from 35 to 52.
- Gladiator Class's maximum unit cost restriction increased from 19 to 46.
- Warrior Class's maximum unit cost restriction increased from 14 to 32.
- Win, Lose and Additional Scoring Bonuses for Conqueror, Gladiator and Warrior Classes have been set to be the same as Hero Class.
Balancing Updates from v.1.13.30:
- Healing will be capped at 20,000 HP.
- Passive, non-conditional “resistance against 1 KO attack” effects (eg. Sae’s LS, Yggdrasil Edict) will be limited to a max of 2 times.
- Passive, conditional “resistance against 1 KO attack” effects (eg. Blaze’s ES, Yggdrasil Edict) will also be limited to a max of 2 times.
- Example: Using Blaze (ES and SP option) equipped with Yggdrasil Edict will trigger a maximum of 4 “resistance against 1 KO attack” effects.
Balancing Updates on July 17, 2019:
- Conqueror Class's maximum unit cost restriction increased from 52 to 54.
- Gladiator Class's maximum unit cost restriction increased from 46 to 50.
- Warrior Class's maximum unit cost restriction increased from 32 to 45.
Balancing Updates from v.2.14.0:
- Arena HP Bonus is now in effect and is based on the Omni+ Boost rarity of each unit.
Balancing Updates on June 3, 2020:
- Arena HP Bonus is no longer in effect.
Balancing Updates from v.2.16.0:
- The chance to reduce damage to 1 is now capped at 25%.